 I know we do a lot of high intensity workouts together, so today I wanted to slow things down and show you another style I use to train that really fires up the intrinsic stabilizing muscles of the hips, butt and core – those muscles that support our posture, alignment AND sculpt those dangerous curves 🙂
You can do this at home with a couple jars of peanut butter (or coconut oil, or light dumbbells) for props like I am – I had to eat some to even out the jar weight LOL. You’ll want an ottoman or bench handy as well for some of the elevated moves.
Doing low-impact workouts doesn’t mean low intensity – there are many ways to turn up the heat.
I was sweating just halfway through this sequence, and you’ll definitely find it challenging at any fitness level.
I’ve got modifications in there for you so you can build strength in your body – be where you are at, and remember that giving it the best you’ve got is just right!
Time Stamp – Workout Begins: 2:30 if you’d like to repeat it & skip the warmup
Special thanks to my friend Cassey Ho from Blogilates for my gorgeous Spring Yoga mat!
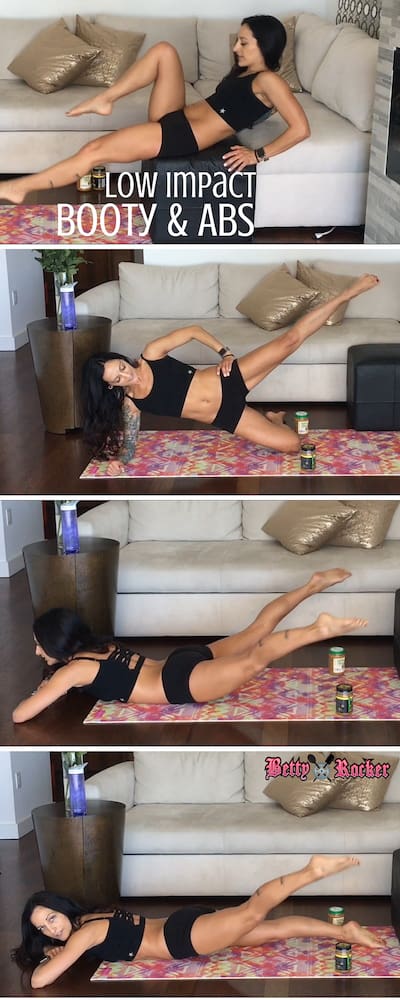
Low Impact Abs and Booty Home Workout
Click to expand and see all workout move descriptions.Move 1: Bent Knee In & Outs (10)
- Come to a seated position on your tailbone with your hands behind you.
- Engage your abdominals as you lean back slightly and lift your knees to chest level.
- Extend your legs out straight, then draw the knees back into your chest.
Move 2: Straight Leg Lifts (15)
- Continue with move 1, or straighten your legs for this more challenging variation.
- Straighten the legs and lean back, lowering them while keeping your core engaged.
- Draw your legs up as you lift your torso. Use your hands to stabilize you.
 Move 3: Elevated Bridge Lift with Biceps Curls (10 each, then 15 together)
- Part 1: Grab your weighted objects and lay on your back. Draw your shoulders down and back so they’re touching the mat. Notice how this opens your chest. From this position, curl your weights up to your shoulders into bicep curls.
- Note: Make sure to keep your shoulder blades engaged by squeezing your shoulder blades together and keeping your shoulders relaxed and lowered. Allow there to be as much space as possible between your ears and shoulders. This prevents you from doing bicep curls in a shoulder forward position.
- Part 2: Position yourself in front of your box or ottoman, and place your heels on it. Drive down through the heels to lift yourself up, squeezing your butt and core.
- Modification: keep your feet on the floor, press your weight into your heels, lift your booty and engage your core.
- Part 1 and 2 together: Drive the heels down to lift your hips as you simultaneously curl the arms. Lower down with control.
Move 4: Prone Lateral Lift and Raise – isolated (20 each leg)
- Place your objects on either side of your mat, close to the bottom.
- Position yourself on your stomach with your legs inside your objects, at about calf height. Engage your core.
- Lift your right leg up, engaging your glute and clear your object, bringing it over and to the right. Repeat back to center. Repeat with the left leg. Continue alternating legs.
- If you are comfortable, you can bring your wrists down to the floor crossed in front of you and lay your head down on your wrists while you alternate this move one leg at a time.
- As you continue alternating, focusing on each lift over the weighted object, feeling the squeeze. Try reaching further out with your legs as you get comfortable with the movement.
- It’s super important to keep your core gently engaged and to stop if you feel a strain in your lower back at all.
Move 5: Prone Lateral Lift and Raise – together (20)
- Stay in the same position (prone – or on your stomach) and lift your legs at the same time over your objects and out to the sides.
- Do this smooth and controlled and keep your core engaged.
Move 6: Side Plank Ab and Booty Combo
- A: Leg Lifts (15) Come onto your right side, stacking your elbow below your shoulder and bottom knee down. Square your hips in front of you and begin lifting and lowering your top leg in a smooth motion.
- B: Forward Taps (10) From the same position, begin tapping your top leg in front of you, then return to start. Maintain a stable torso and strong, engaged core throughout this movement.
- C: Hip Dip (10) Straighten the top leg and hold it stable as you drop and raise your bottom hip to touch the mat.
- D: Hip Dip to Raise (10) Lower the hip and as you press it back up, lift the top leg. Maintain a stable pelvis.
- E: Hip Dip to Raise and Tap (10) Lower the hip and as you press back up, tap the foot forward and then back to start.
Move 7: Sumo Squat Jumps (20)
- Stand with your feet out wider than hip distance. Engage your core and position a box or ottoman behind you.
- Keep the weight back in your heels and squat down, allowing your knees to track over your toes and keeping your chest up.
- Engage your booty to come back up into a jump. Land lightly with a soft bend in the knees to repeat.
- Take the jump out of this to keep the workout entirely no impact. Do sumo body squats instead.
Move 8: Elevated Scissors (20)
- Come back onto your box and reposition yourself like you did in Move 1.
- You can take the variation I show you first in the video where you bend your knees and do alternating knee ins, or you can straighten the legs and do straight leg raises up and down.
- Be sure to keep your core engaged to protect your back.
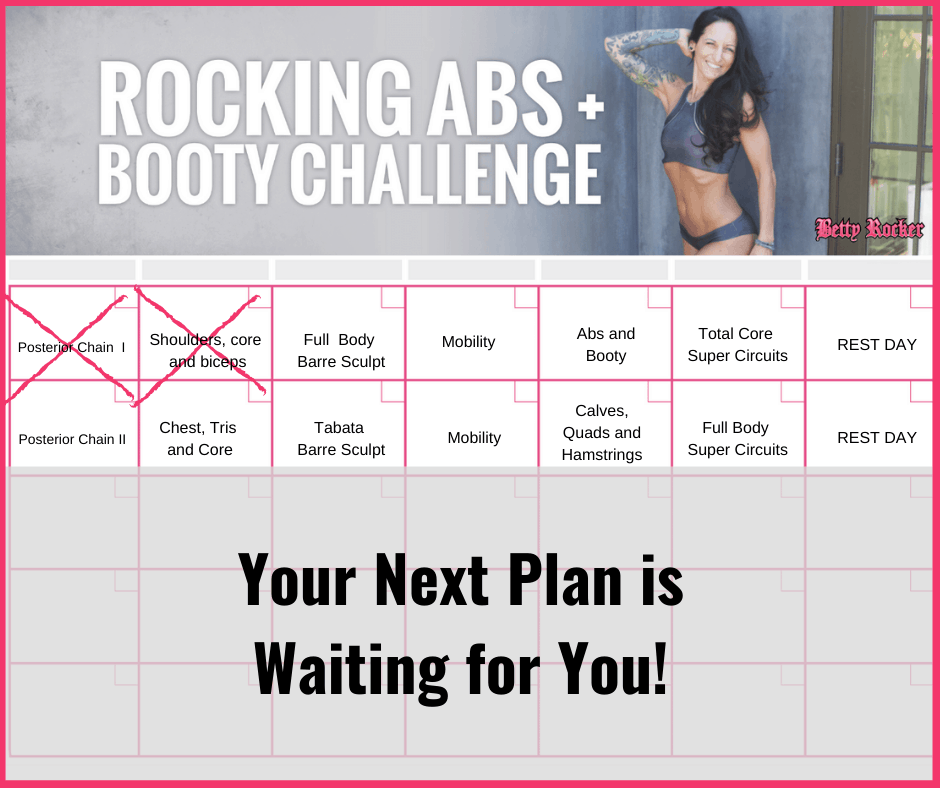
In Rock Your Life there are dozens of fun 30-day challenges to choose from – and I have a feeling you’d LOVE this one!
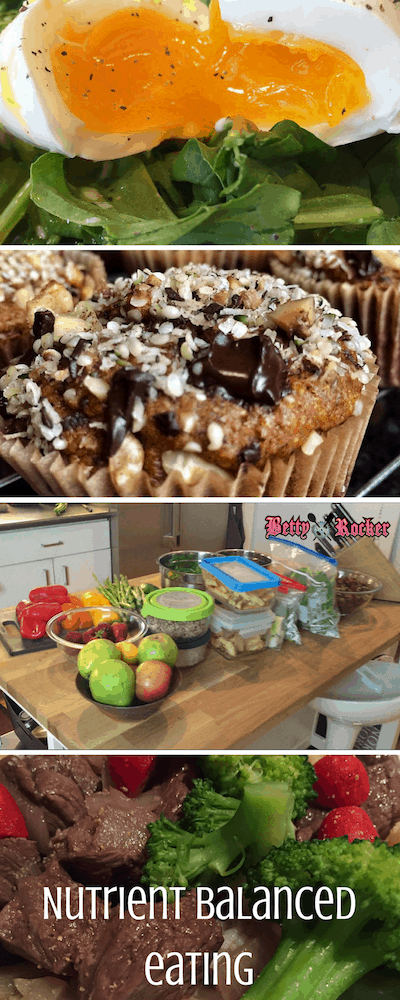
Pre and Post Workout Eating…
 There is a lot of random and mixed information floating around about pre and post workout nutrition.
While many supplement companies and fitness magazine ads would love you to spend money on pre and post workout drinks and talk loudly about the importance of “nutrient timing” they’re just packaged versions of the same things you can get from the whole food meals you’re spending your money grocery shopping for. So don’t get bamboozled into thinking you need a bunch of fancy stuff or that you have to worry about setting a timer and eating within a window every time you train.
The bottom line is it’s way more important to be eating healthy, whole foods and balancing your nutrient intake consistently than it is to worry about perfect meal timing unless you’re a pro athlete.
If you eat a balanced meal 1-2 hours before training that at minimum includes protein and carbohydrates, and do the same 1-2 hours after training, you’re totally set. Nutrient timing can be thrown around as something that has this big impact on your results, but it’s not the end-all be-all by any means.
Focus on and master eating healthy whole food meals (that contain protein, quality carbs, fat and greens) 3 times a day for starters and get super consistent with that. Add in a protein shake for an extra serving of protein, and throw some fruit and greens in there for a boost of fast-burning carbs and fiber as a bonus.
If you did that consistently day after day, when you worked out would only matter as far as you wouldn’t want to exercise too close to eating, as it could lead to indigestion. And you wouldn’t want to wait too long to eat because you just expended a lot of energy and you’ll feel hungry sooner.
Hope you enjoyed today’s workout! Be sure to leave me a note below to let me know you did it!
Let me make healthy eating easy for you! Take my Eating Type Quiz!